How Do You Mirror Crochet and Mirror Again
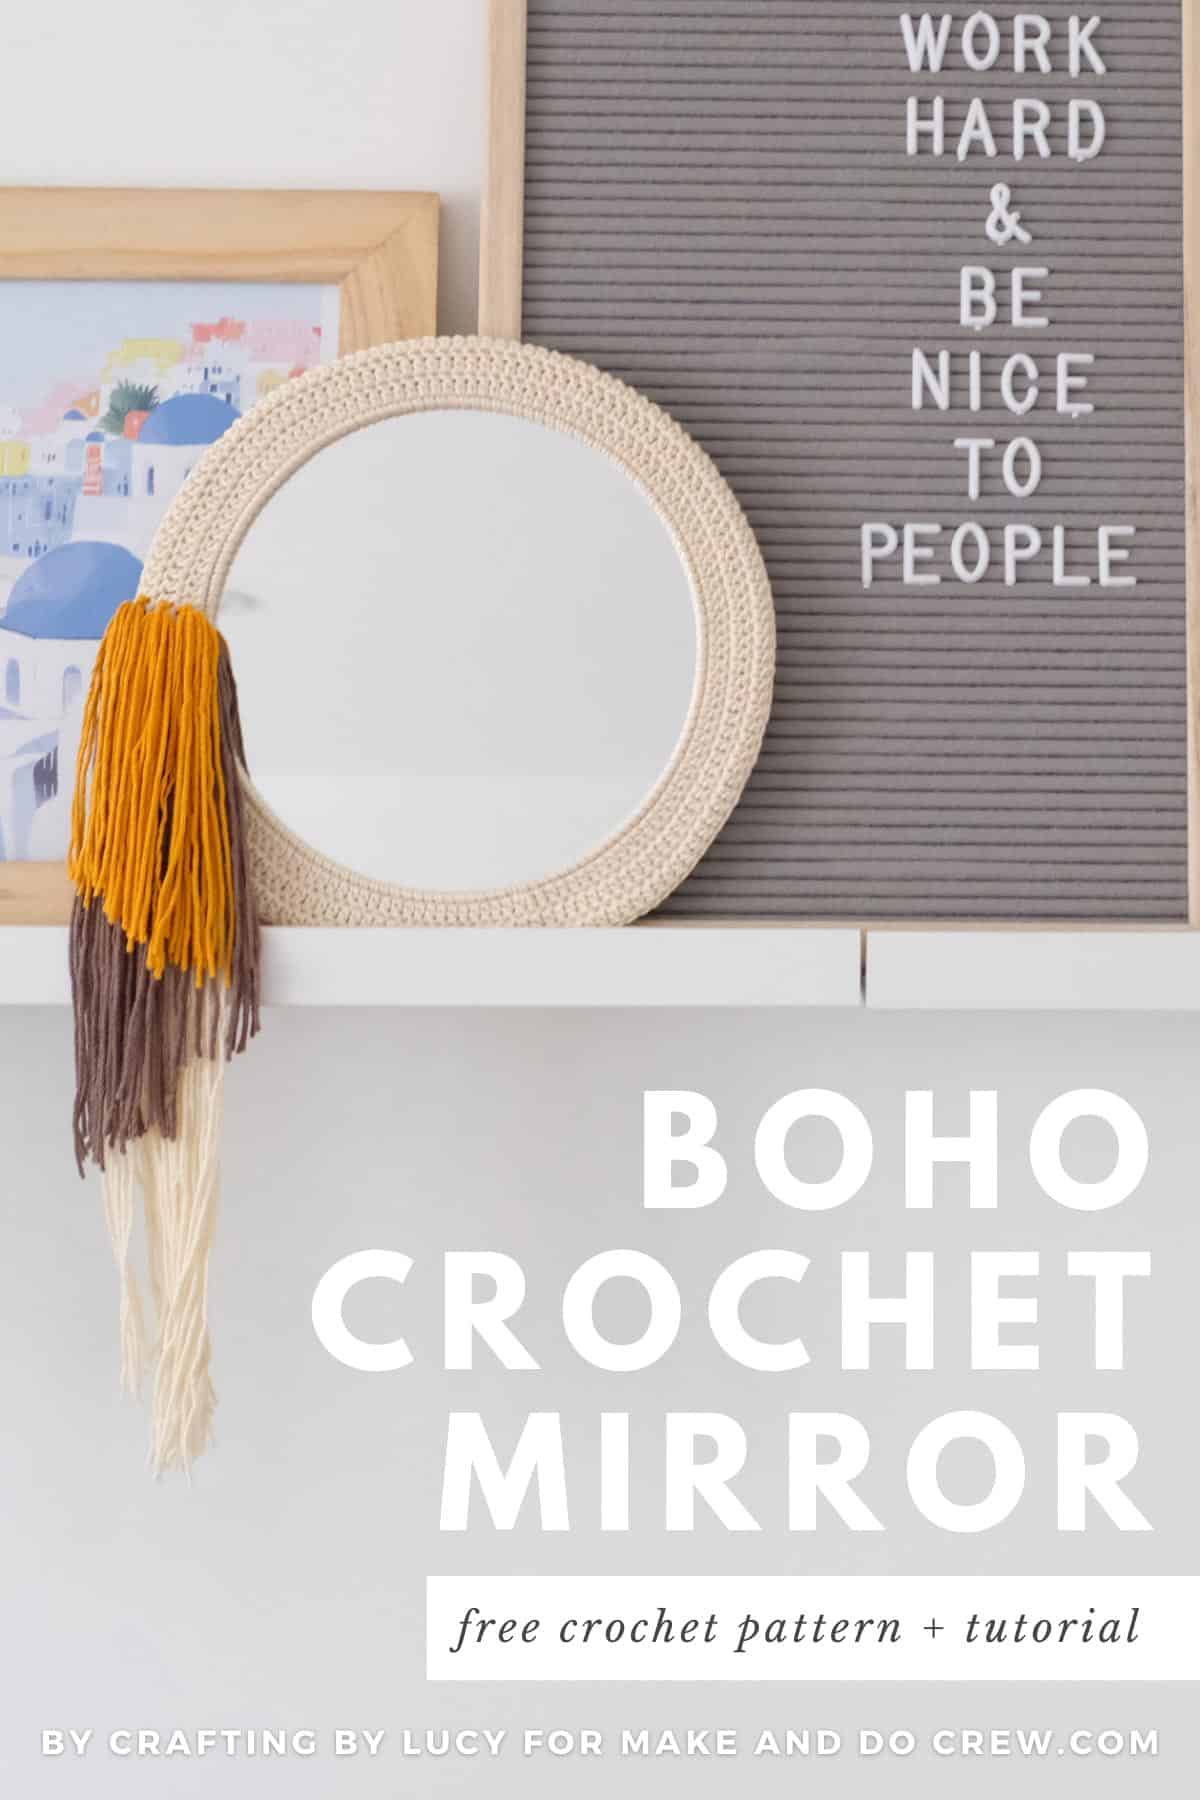
Learn how to crochet a mirror wall hanging with this unique free design and detailed tutorial.
Thank you to Panthera leo Make Yarns for supplying the yarn for this crochet mirror pattern. This post contains chapter links.
Welcome back to the Brand & Practise Crew guest designer series where talented designers from across the internet share their free patterns with you, right hither on Make & Do Crew.
Today Lucy from Crafting past Lucy is here with her gratis crochet mirror pattern! You tin meet lots of of Lucy'south crochet patterns her blog, Crafting by Lucy. And exist certain to bank check her out on social media too: Instagram and Pinterest. Lucy, take it away!
The Inspiration Behind This Project
I really enjoy making functional crochet designs, finding things to recycle around the home to incorporate in my patterns. This pattern was inspired past a failed try at making a dreamcatcher! I definitely gear towards smaller crochet makes. What usually starts life every bit a coating usually turns into a bag so it doesn't striking the WIP pile never to render!
Every bit a household we volition be trying to do our scrap and reduce our waste more than and more this year, giving me the perfect alibi to use up my cotton stash on marketplace bags, washcloths and confront scrubbies. Watch Crafting by Lucy for some new eco crochet patterns!
Related: More free crochet patterns for your home ⇨
The Best Yarn for Crochet Dwelling house Dec
I'm a sucker for anything colorful so I dear working with cotton yarn, it'southward definitely my favorite. My go to hook size is a 4mm, although I have been experimenting with tiny 2mm hooks recently for some very intricate cotton patterns.
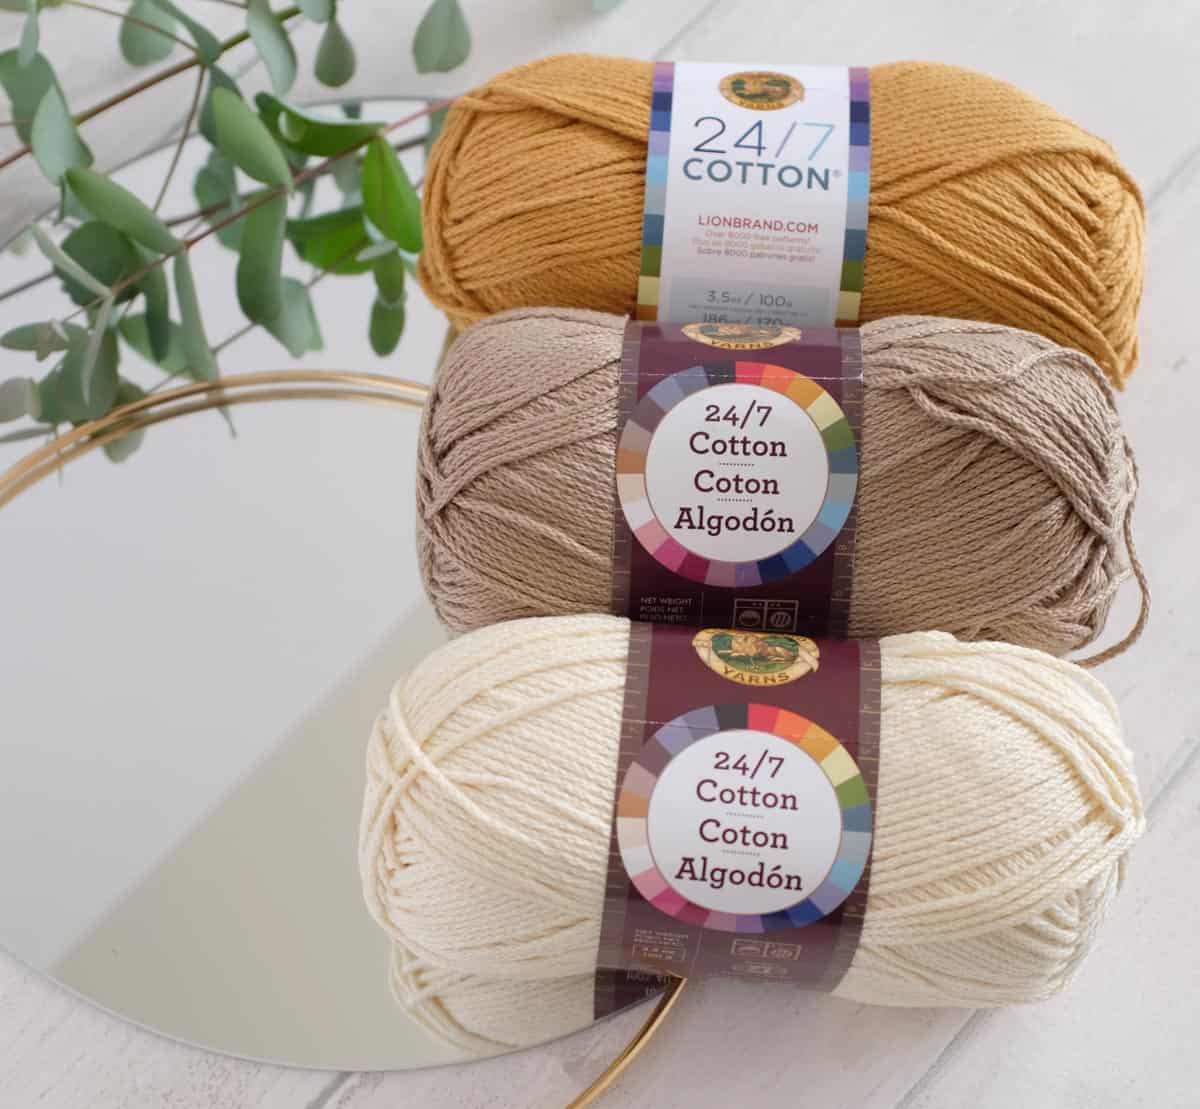
Making this mirror was my first experience of using Lion Brand 24/seven Cotton and I can honestly say it's my new go to cotton fiber! It has such a luxury experience to it, giving your projects that extra special finish.
Related: More than free crochet patterns using cotton yarn ⇨
Skills Y'all'll Practice
This is an advanced-beginner level blueprint using iii simple crochet stitches. This is the perfect beginners project if you are looking to step out of your comfort zone and endeavor a different way of crochet incorporating other objects.
This pattern could as well be used as a decorative photo frame to brighten up a room in your choice of colors, or simply add a flake of texture to your walls. If you are already confident with yarn color changes you may like to create a striped version of this mirror and beautify it with pom poms rather than tassels, the possibilities are endless!
Pivot It! Click to pin this pattern for later ⇨
More Free Crochet Patterns
Does this crochet tassel mirror have y'all feeling gear up to aggrandize your skills? Cheque out these free crochet patterns from Make and Do Crew.
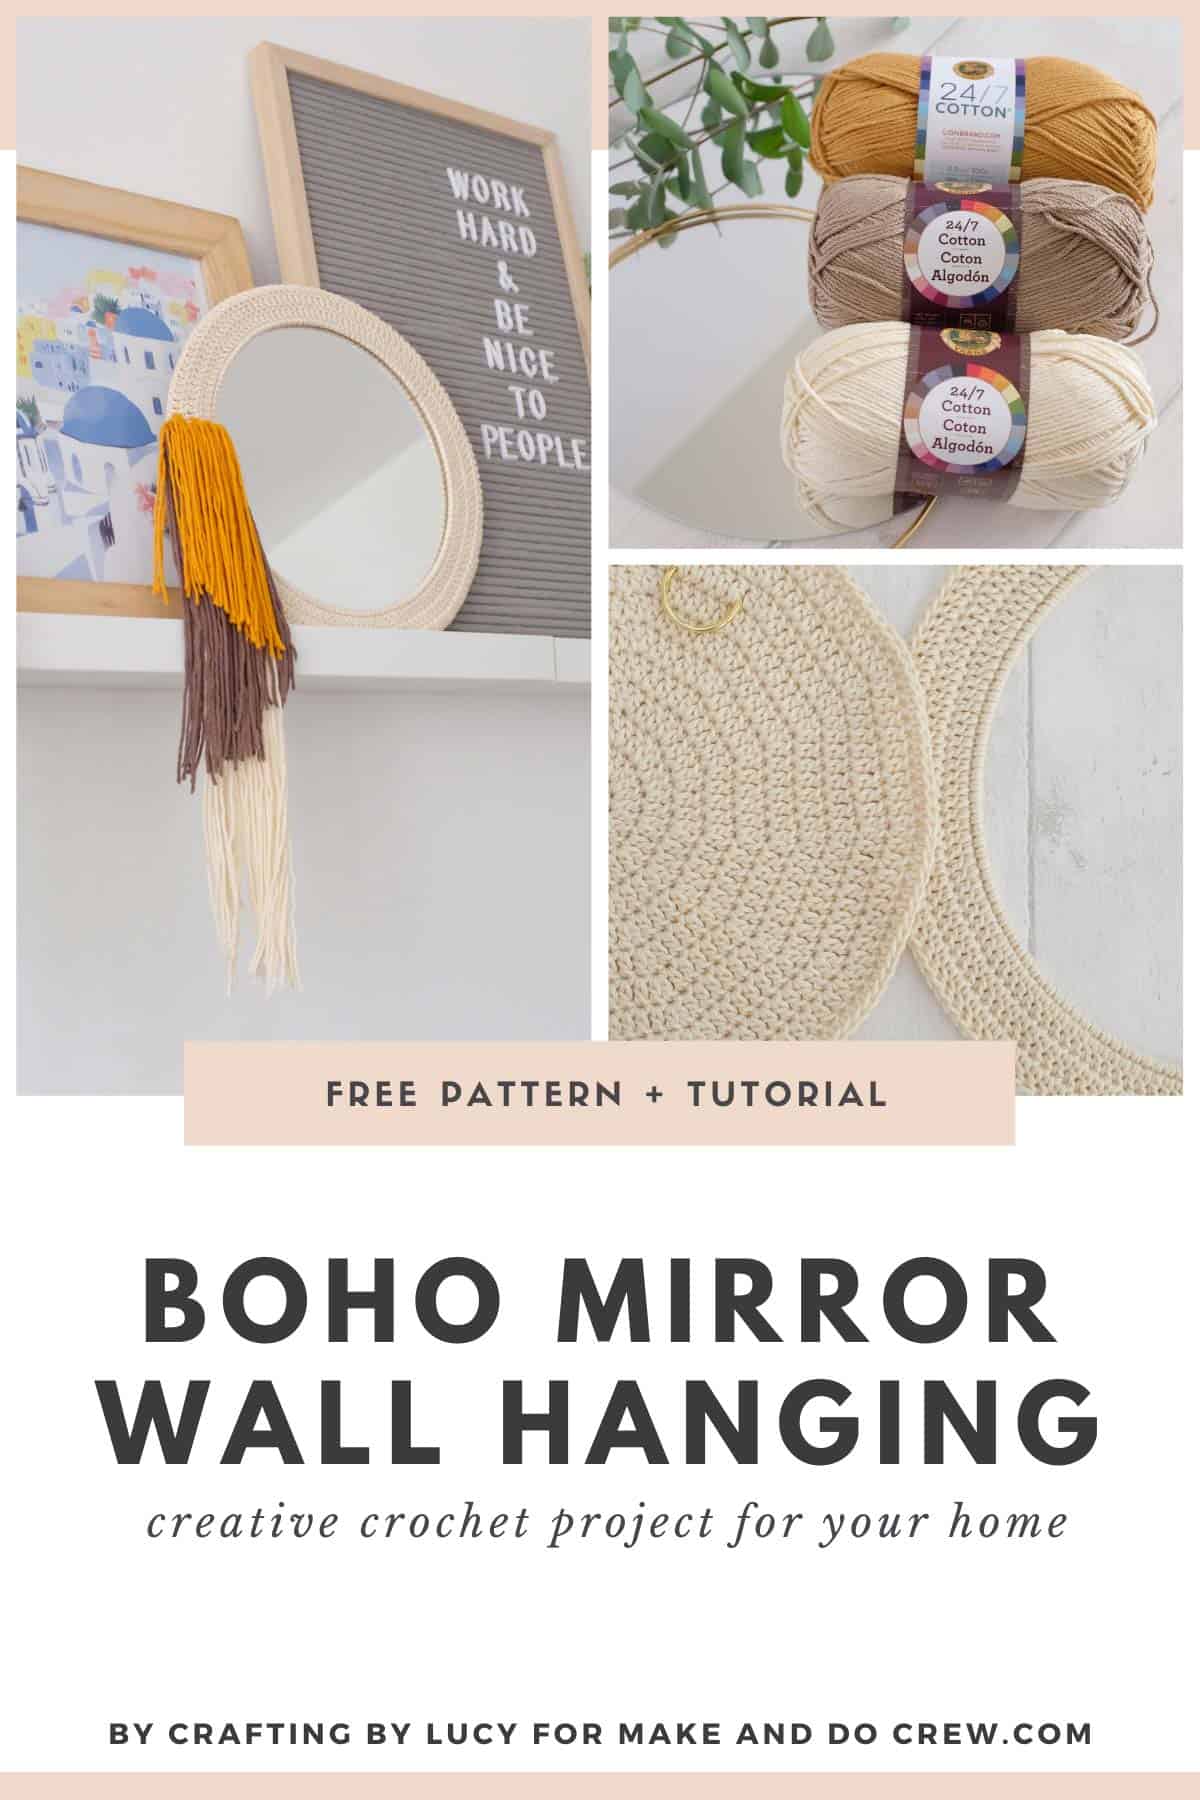
Tassel Crochet Mirror
Free Pattern + Tutorial
Pin this pattern for subsequently hither.
Caption: The perfect mode to introduce some colour and texture to your home decor. This mirror can be made in different color ways to suit your decor theme and adorned with colorful tassels to give information technology that wow factor. This is an like shooting fish in a barrel beginners project using unproblematic crochet stitches and techniques.
Supplies:
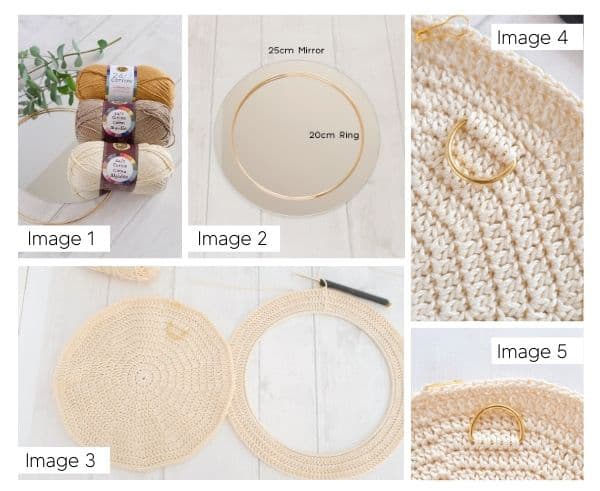
• Lion Brand 24/7 Cotton (Weight: iv/medium – 186 Yds, 3.5 oz)
– Color A: Ecru (#761-098) – 1 ball
– Color B: Cafe Au Lait (#761-126) – 1 brawl
– Color C: Goldenrod (#761-158) – i ball
• U.S G6 (4.25 mm) crochet hook
• Mirror (25 cm)
• Arts and crafts ring (20 cm)
• Yarn needle
• Scissors
Sizes/Measurements:
• Measurements in cm:
– Front end (measured from the ring to the concluding row of your crochet approx. three cm)
– Back 23.5 cm
Gauge:
• Tension is not of import for this blueprint.
Abbreviations and Glossary (U.s. Terms):
MR – Magic Ring
DC – Double Crochet
SC – Single Crochet
Slst – Slip Stitch
Overall Pattern Notes:
• This crochet mirror is worked up in 2 parts, forepart and back. Come across Mirror Image three below.
• Begin by working the Dorsum section of your Mirror. The final stitch count of the last round in your back section will decide your sew together count around the front ring of your mirror to ensure the work tin be seamed together neatly with no backlog gathering.
• The front section of your piece of work is then attached to the back section with the mirror placed in between. The ii sections of your work will be sewn together.
• Your back section should measure slightly smaller than the overall size of your mirror. This is to permit a tight tension in one case seamed together to ensure the mirror hangs correctly.
• The D Ring is stitched into the Right Side of the back department of your mirror for hanging. See Mirror Image 4 beneath.
• Tassels are an optional beautification for your mirror.
Dorsum SECTION
*2 ch at the beginning of each round counts as a st.
Begin by making a Magic Ring
Round 1: ch2, 14dc into the ring. Join with a sl st to your ch 2 at the starting time of this round.
Round ii: ch2, 2 dc in each st around, bring together with sl st (28sts)
Circular three: ch2 *i dc in kickoff, 2 dc in side by side* echo 13 times, 1 dc in last st, join with sl st (41sts)
Round 4: ch2, *1 dc in first 2 sts, ii dc in next* repeat 13 times, 1dc in concluding st join with sl st (54sts)
Round 5: ch2, *1 dc in first 3 sts, 2 dc in next* repeat 13 times, 1dc in concluding st join with sl st (67sts)
Circular 6: ch2, *i dc in first 4 sts, 2 dc in next* repeat 13 times, 1dc in last st bring together with sl st (80sts)
Round 7: ch2, *1 dc in showtime 5 sts, two dc in next* repeat 13 times, 1dc in last st join with sl st (93sts)
Round eight: ch2, *one dc in first six sts, 2 dc in side by side* repeat 13 times, 1dc in last st join with sl st (106sts)
Circular 9: ch2, *1 dc in first 7 sts, 2 dc in adjacent* repeat eight times, 1dc, attach your D Ring to your piece of work by working the next 4dc over the flat section of your D Ring. 1dc in each of the side by side 2 sts, 2dc in next st. *i dc in adjacent 7 sts, ii dc in next* repeat 4 times, 2 dc in the last st, join with sl st (119sts). *See Mirror Image iv & 5
Circular 10: ch2, *one dc in first 8 sts, 2 dc in next* repeat 12 times, 9dc join with sl st (130sts)
Round 11: ch2, *i dc in first nine sts, two dc in next* repeat 12 times, 9dc bring together with sl st. (142sts)
Round 12: ch1, i sc in each st around (142sts)
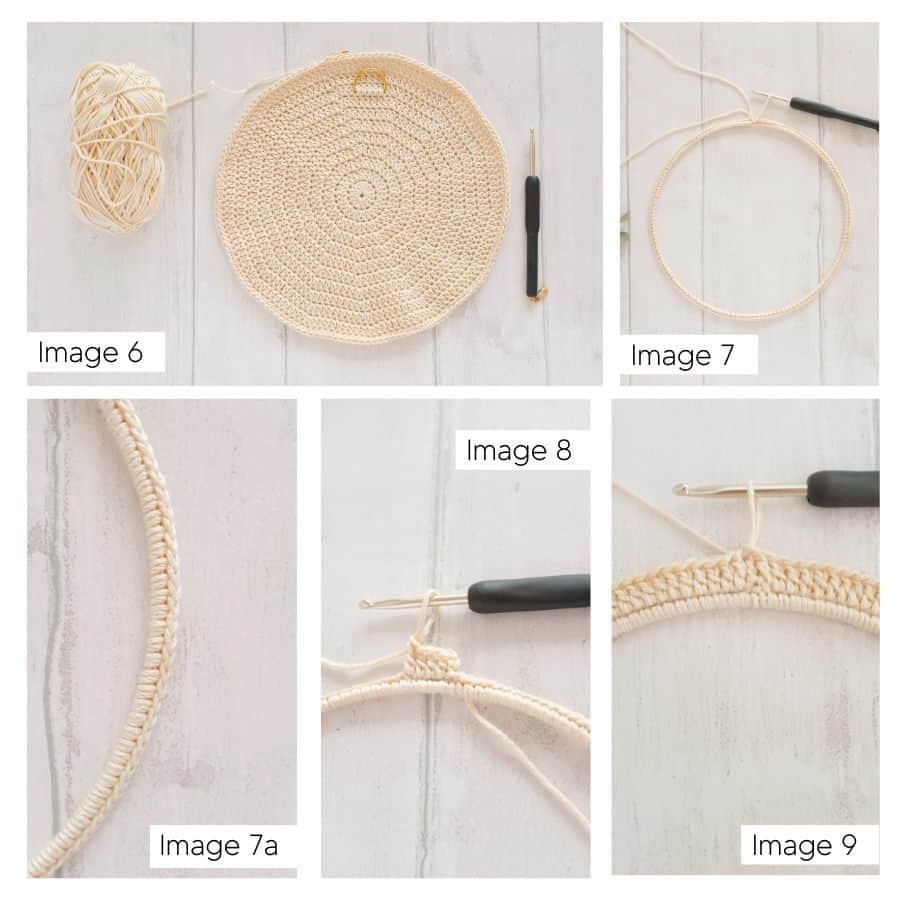
See Mirror Epitome six.
FRONT SECTION
There are no increases worked on the front section.
Round 1: Create a loop on your claw and sc 142sts over your hoop. Join with a sl st. (142sts) Encounter Mirror Epitome seven and 7a
Round 2: ch2, 1dcin each st around. Join with a sl st (142sts) Come across Mirror Prototype 8 & nine
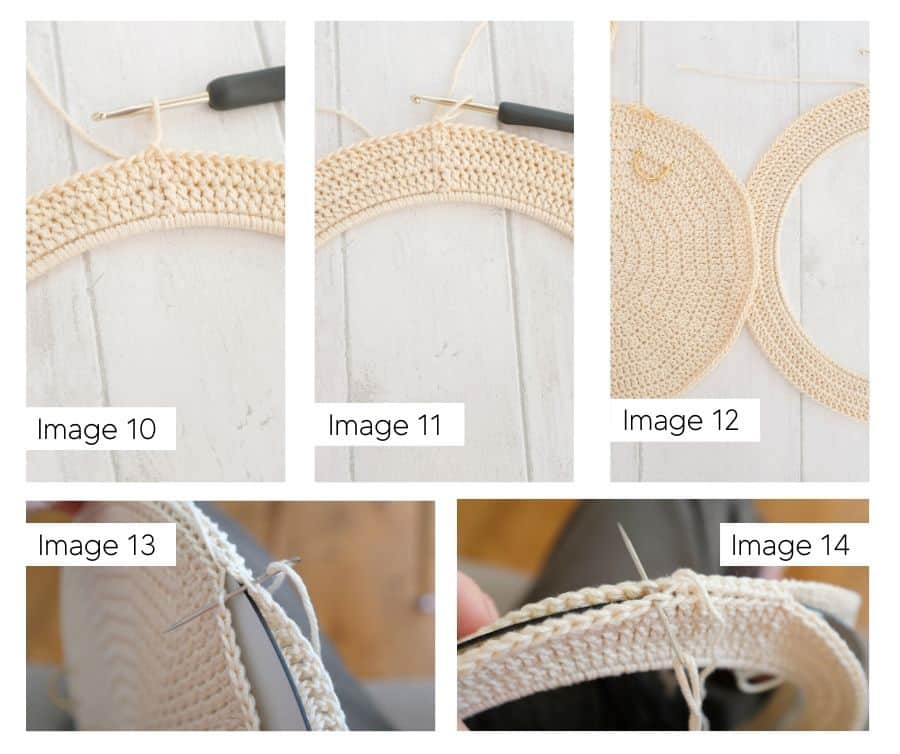
Round three: ch ii, ane dc in each st around. Join with a sl st (142sts) See Mirror Image ten
Round four: ch2, 1 dc in each st effectually. Join with a sl st (142sts) See Mirror Image 11
Spike off your yarn and sew together in your loose ends. Ensure your ends are sewn into the back (WS – Wrong Side) of your work to ensure they are not visable.
JOINING Front end & Back
See Mirror Prototype 12
Line up your front and dorsum department of your work and identify your mirror in the centre. Ensure the D Band on the back of your work is on the outside to enable you to hang the mirror.
Accept a length of your Yarn A and your needles and brainstorm sewing your work together around the edge ensuring you lot are working in the Dorsum Loops Only for both the front and the dorsum of your work.
See Mirror Prototype xiii & xiv
Once you have sewn your two sides together and your mirror is secure fasten off your yarn and sew in any loose ends.

ATTACHING TASSELS/FRINGE
Begin by cutting 8 ten lengths of Yarn A measuring approx 76cm (or your desired length) Yarn A will be the longest hanging tassel.
See Mirror Epitome fifteen
Gather your 8 lengths and fold them in one-half. Use a small slice of Yarn A to tie a knot in the top of your tassel to secure the 8 lengths together.
See Mirror Image 16
Repeat twice more until you have 3 tassels the aforementioned length in Yarn A.
Find the starting ch2 section of your circle and attach each tassel to your 3 starting chains using a secure knot. 1 tassel per ch st.
Meet Image 17 & 18
Repeat the Steps above for your next 2 coloured tassels in
Yarn B – lengths measuring approx. 46cm (or your desired length)
Yarn C – lengths measuring approx. 30cm (or your desired length)
Adhere the Yarn B tassels to the dc sts above where you take just attached your Yarn A tassels and then they hang over Yarn A – Come across Image 19
Attach the Yarn C tassels to the dc sts above where yous have merely attached your Yarn B tassels to ensure they hang over Yarn B – Meet Image 20
Stitch in any loose ends ensure they are not visable.
Your tassels should hang at the side of your mirror with the D Ring on the reverse in the top central position for hanging your mirror.
Trim your tassels to your desired shape / length using abrupt pair of scissors or a rotary cutter.
Your mirror is at present ready to hang!
Thanks once again to Lucy from Crafting by Lucy for sharing this gratuitous crochet mirror pattern! Exist certain to check out Lucy'southward blog for lots more complimentary modernistic crochet patterns!
More Free Crochet Dwelling Decor Patterns
Looking for more than ways to add together some stylish DIY crochet domicile decor to your house? Don't miss these gratuitous crochet patterns for home decor projects. Find all our dwelling house decor crochet patterns here.

Source: https://makeanddocrew.com/crochet-mirror-pattern-tutorial/
Postar um comentário for "How Do You Mirror Crochet and Mirror Again"